How we picked
Four rules decided every line of every tier, and they are the same four whether you are spending a little or a lot.
1. Every tier covers all five jobs.A kit with a great lock and no rear light is not a cheaper kit, it is an incomplete one. The starter tier below is genuinely complete — it is just built from the least expensive thing that honestly does each job, rather than from nothing at all.
2. Security is graded against an independent standard, not a brand scale. Kryptonite grades its own locks 1-to-10 and ABUS grades its own 1-to-15, and neither number means anything across brands. Where an independent Sold Secure grade exists we use it, and where it does not we say so. The full explanation is in bike lock security ratings explained.
3. Lights are ranked on published output and run time, in the mode you will actually use. A light quoted at 1,100 lumens does not run at 1,100 lumens for its quoted run time, and a commuter almost never uses the top mode anyway. We say which figure is which.
4. Cheapest thing that does the job wins.Where a budget item genuinely covers the requirement, it is the pick, even where a pricier one would earn us more. Where it genuinely does not — and on locks it often does not — we say that instead of pretending.
Tier 1: the starter kit
This is the honest floor. It is what you buy when you are not yet sure the habit will stick, when the bike is second-hand or borrowed, and when the commute is short, mostly daylit and in a place where bikes do not disappear off the street routinely. It is not a compromise on completeness — all five jobs are covered — it is a compromise on margin.
- Lock: the budget U-lock tier. A hardened U-lock at the cheap end is a real lock; a cable lock at any price is not. This is the line where “cheap” still has to mean “hardened steel”.
- Lights: a budget USB light set. Front and rear in one purchase, rechargeable, enough to be seen on a lit street. Not enough to light an unlit one — that is the tier-2 upgrade.
- Cargo: a front basket or the cheapest clip-on pannier. Anything that gets the weight off your back beats the best backpack.
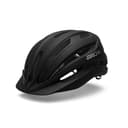
- Helmet: the cheapest certified lid. Every helmet sold for road use in the US meets the same federal standard, so the budget one genuinely protects you.
What you give up: run time and beam quality on the lights, and the ability to leave the bike locked outdoors all day in a city with a real theft problem. If either of those describes your commute, skip this tier.
Tier 2: the everyday kit (the one we’d buy)
This is the ranked list above, and it is the tier that fits the largest number of real commutes: a few miles each way, parked somewhere semi-public for a working day, ridden in the dark for a chunk of the year, carrying a laptop and a change of clothes.
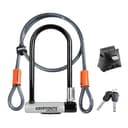
The Kryptonite KryptoLokis the anchor. It is a hardened U-lock with a cable for the front wheel, which is exactly the shape of the everyday problem — the U takes the frame and rear wheel to something solid, the cable stops the easiest opportunist grab. It is not an angle-grinder lock and we do not pretend it is; if that is your risk level, see the no-compromise tier.
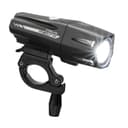
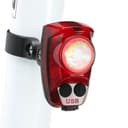
The Cygolite Metro 1100 and Hotshot Pro 200 are the light pairing because they solve different halves of the same problem. The Metro has enough output to light a genuinely unlit stretch, and the Hotshot is bright enough to be seen in daylight, which is when a surprising share of collisions happen. If you only ever ride lit streets, you can drop the front light a tier and spend it on the lock. The reasoning behind that trade is in be seen vs see the road.
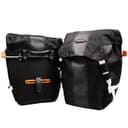
The Ibera PakRak panniers cover carrying without the premium of a fully welded roll-top, and the Giro Register MIPS puts rotational protection on your head at a mainstream price. Neither is the most expensive option; both are the point where spending more stops buying much.
Tier 3: the no-compromise kit
This tier is not about luxury, it is about specific, identifiable risk. Buy it if any of these is true of your commute: the bike is expensive or electric, it lives locked outdoors in a dense city, or a meaningful part of your route is genuinely unlit.
- Lock:a Sold Secure Diamond-rated U-lock or hardened chain — the only tier whose test includes an angle grinder. See are angle-grinder-proof locks worth it for the honest version of what that buys, and the best locks for e-bikes if the bike is powered.
- Lights: a premium front light with a published run time at the output you will actually use, plus a daylight-visible rear. The picks are in best lights for night riding.
- Cargo: fully waterproof roll-top panniers — the best waterproof panniers — if a laptop rides with you.
- Plus: at this value it is worth adding a tracker and fenders. Neither is an essential; both stop being optional once the bike is worth real money and rides in real weather.
Where the money actually goes
A useful way to think about the budget: the bike is usually 70–90% of the total, and the kit is the rest. That ratio is why the most common mistake we see is spending the entire budget on the bike and then locking it with whatever was on the counter at checkout. A rough rule that has held up for a long time is to put 10–20% of the bike’s value into the lock, and to adjust upward if it lives outside. On a cheap second-hand hybrid that is a modest number. On an e-bike it is not, and it should not be — e-bikes are heavy, expensive and easy to resell, which makes them the most-targeted bikes on the street.
The lights are the other place people under-spend, usually because a light feels like it either works or it does not. It does not work like that: a light has an output, a beam shape and a run time, and the number on the box is usually the output in a mode that flattens the battery in an hour. If you want the arithmetic on what you actually need, how many lumens do you need works through it by street type.
What to buy second
Once all five jobs are covered, stop and ride for a few weeks. The next purchase should answer a problem your own route handed you, not a problem a product page invented. In practice the two that come up first are weather — rain gear in autumn, winter gearwhen the clocks change — and the small cockpit items that make a daily ride less annoying, which are on the accessories page.
If you are still deciding on the bike itself, that decision comes first and changes everything downstream: how to choose a commuter bike covers the frame features that decide whether this kit will even fit, and the e-bike starter kit covers what changes when the bike has a motor.